Compatible with: Windows 10 8 Pro and 7 also Server 2008 and 2003 and Vista, XP and 2000 and NT
It generates a network inventory without installing software on the users' PCs. Get complete information about operating system, service packs, hotfixes, hardware, software and running processes on remote PCs. Powerful reporting module helps you save a lot of time for preparing asset reports.
Hardware Inventory
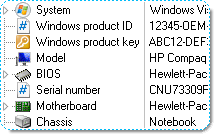
Using Network Asset Tracker you will have up-to-date hardware information about each workstation on your network.

Software Inventory

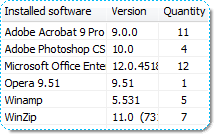
You can track software installed on your network computers, unwanted applications, applications that require an upgrade. Network Asset Tracker retrieves the product keys for a variety of Microsoft Windows, Office, SQL Server and dozens other software products. It provides the information to assist in managing an enterprise's installed software, implementation and license compliancy program.
Data Reporting
Just apply the necessary filtering to inventory data, and you can easily generate a report on any topic that interests you. You can export reports in HTML, MS Excel, XML, MS Visio XML Drawing and RTF formats.
Examples of reports in HTML format: List-style report, Sheet-style report.
Network Asset Tracker - Screenshots
Network Asset Tracker - How To Use
System requirements
Installing Network Asset Tracker
Run natracker_installer.exe, then follow the setup instructions.
NOTE: You must have administrator rights to begin installation.
NOTE: You must have domain administrator rights to get information from remote PCs. Or you can use Custom Logon. From the "File" menu, choose "Options", then "Custom Logon".
When First Starting
When you first run the program, you must add the users' computers to your list.
You can add computers manually one-by-one, or you can run the automatic adding process, which will add all the computers in your network to the list.
For adding computer manually, from the "Computer" menu, select "New Computer". Then type the NetBIOS-name of the computer you want to add.
To automatically add all the computers in your local network, you should choose the menu "Computer", and then click on the submenu "Find Computers". Network Asset Tracker will then search for the computers in your local network.
You can add computers by IP range. To do this you should choose the menu "Computer", and then click on the submenu "Find Copmuters by IP Range". In the dialog you should specify an IP range.
To import computers from the file, you should choose the menu "Computer", and then click on the submenu "Import of Computers from File". You should then choose a file in text format (*.txt), where each line - is a computer name.
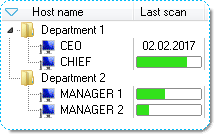
On the left side of Network Asset Tracker window you will see a list of computers along with information about the version of Network Asset Tracker and the date the information was last updated.
The status bar shows the number of computers on your list.
To delete computers from the list, from the "Computer" menu, select "Delete Computer", or press the Delete key.
Add Custom Columns
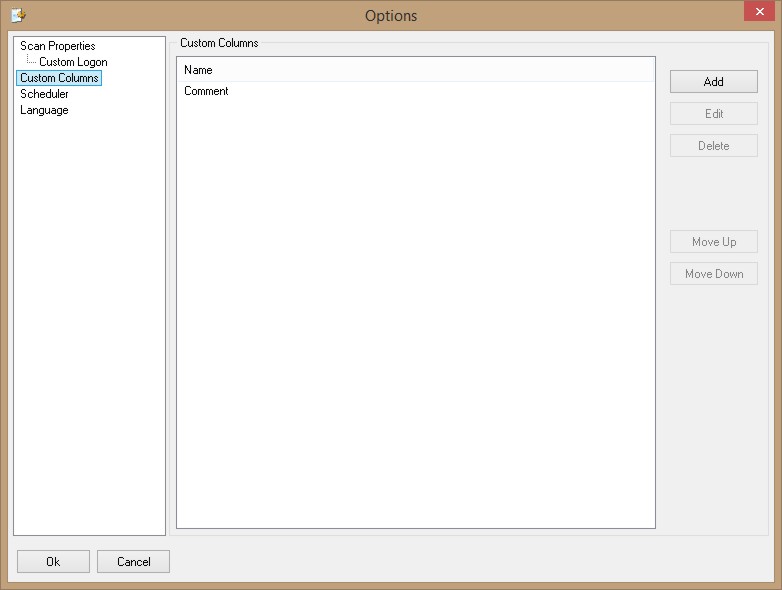
You can add custom columns to the list of computers in the left side of Network Asset Tracker window. For this choose "File" from the main menu, then choose the submenu "Options". In "Options" form choose "Custom columns".

Also you can delete columns or move columns up or down.
Get Inventory Information
Clicking on a computer name in list will show information about the computer in a window on the right-hand side of the screen. Double-clicking will update the information.
To get information about the system on a user's computer, select "System". To get information about software on a computer, choose "Software". To get information about running processes, choose "Process".
To change the type of information collected, from the "Computer" menu, select "View System Info", or "Computer" then "View Software Info", or "Computer" then "View Processes Info".
To create a custom login name and password, from the "File" menu, choose "Options", then "Custom Logon".
If you can't get information from the remote computer, you can try increase option "Response time". To do this, choose the menu "File" -> "Options", choose "General".
To change the language of the interface, from the "File" menu, choose "Options", then "Language".
Use Scheduler
You can use scheduler to get information from remote PCs. To do this, choose "File" from the main menu, and then choose the submenu "Options". In "Options" form choose "Scheduler".
You can set the time and interval for the inventory. Many scheduling options are available, depending on which schedule you use (hour, day, month).
Create Inventory Reports
You can create reports concerning all the computers on your list. To do this, choose "Report" from the main menu, and then choose the submenu for the type of report that you wish to create. You can also create a detailed report including every type of hardware, or you can use a filter to combine any specific types of hardware into one report. You can export any inventory report to MS Excel, HTML, XML or rich text format (RTF) file.
You can save your settings for reports. For this mark "Save Settings".
You can choose the type of report between "List" and "Sheet".
List-style report contains information about all PCs: Example.
Sheet-style report contains information about all PCs: Example.
Copyright © 2002-2026 MIS Utilities. All rights reserved.
Privacy | Contact us